Swipe gestures can make your app feel smooth, intuitive, and interactive. Whether you're building a to-do list, email app, or a grocery list, adding swipe gestures improves user experience by providing quick actions like deleting or archiving an item.
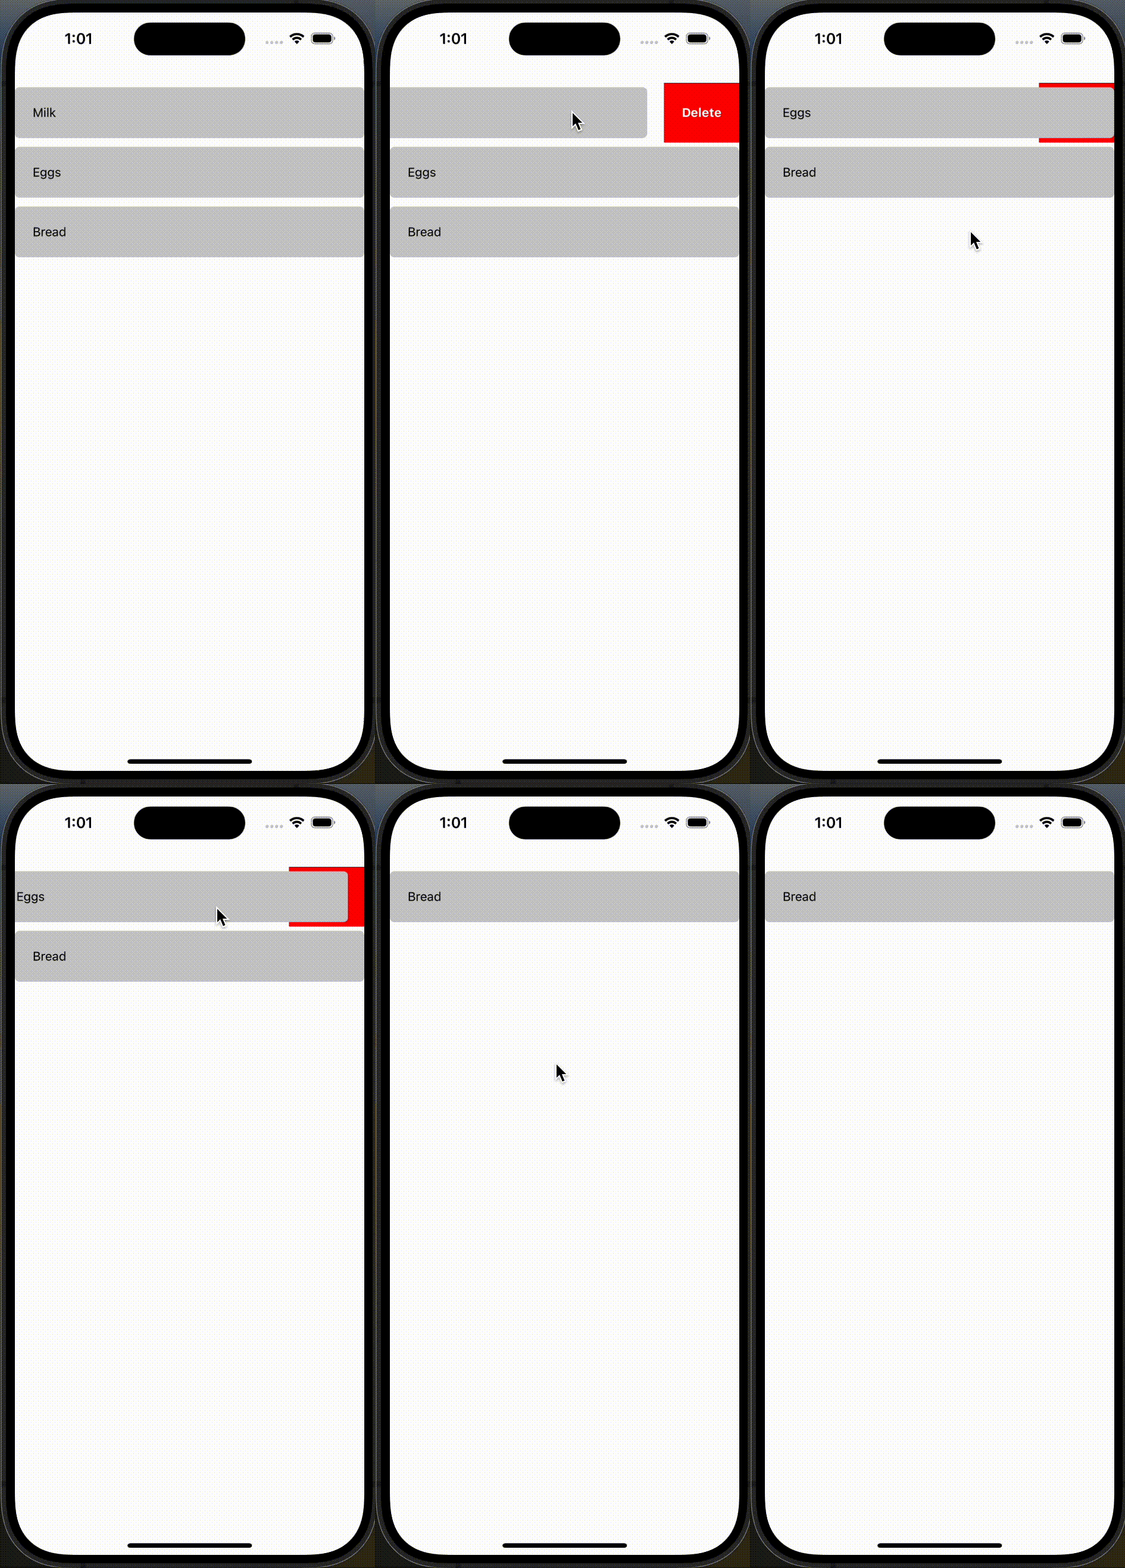
In this post, we’ll go through how to add swipe gestures to a grocery list in React Native, revealing a red delete icon when you swipe an item to the left.
Why Use Swipe Gestures?
Adding swipe gestures makes your app feel more responsive and modern. It’s also a great way to keep the UI clean by hiding actions until they’re needed.
What We’ll Build
We’ll create a simple grocery list where:
- Swiping an item to the left reveals a red delete icon.
- Tapping the delete icon removes the item from the list.
Getting Started
Before we begin, make sure you have react-native-gesture-handler installed
npm install react-native-gesture-handlerFor iOS, don’t forget to run
npx pod-installThen, wrap your app with GestureHandlerRootView in App.tsx
import { GestureHandlerRootView } from 'react-native-gesture-handler';

export default function App() {
  return (
    <GestureHandlerRootView style={{ flex: 1 }}>
      {/* Your app content */}
    </GestureHandlerRootView>
  );
}
Creating the Swipeable Grocery List Item
Now, let's create a swipeable list item that reveals a delete button using Swipeable.
Create a GroceryItem.tsx Component
import React from 'react';
import { View, Text, Pressable, StyleSheet } from 'react-native';
import { Swipeable } from 'react-native-gesture-handler';

interface GroceryItemProps {
  item: string;
  onDelete: () => void;
}

const GroceryItem: React.FC<GroceryItemProps> = ({ item, onDelete }) => {

  const swipeableRef = React.useRef<Swipeable>(null);

  const handleDelete = () => {
    swipeableRef.current?.close(); // Close the swipeable after deletion
    onDelete();
  };

  const renderRightActions = () => (
    <Pressable style={styles.deleteButton} onPress={handleDelete}>
      <Text style={styles.deleteText}>Delete</Text>
    </Pressable>
  );

  return (
    <Swipeable ref={swipeableRef} renderRightActions={renderRightActions}>
      <View style={styles.item}>
        <Text>{item}</Text>
      </View>
    </Swipeable>
  );
};

const styles = StyleSheet.create({
  deleteButton: {
    backgroundColor: 'red',
    padding: 20,
    justifyContent: 'center',
    alignItems: 'center'
  },
  deleteText: {
    color: 'white',
    fontWeight: 'bold'
  },
  item: {
    backgroundColor: 'white',
    padding: 20,
    flex: 1,
    marginVertical: 5,
    borderRadius: 5
  },
});

export default GroceryItem;
Using the GroceryItem Component
Now, use this component inside your list.
import React from 'react';
import { FlatList, View } from 'react-native';
import GroceryItem from './GroceryItem';

const GroceryList: React.FC = () => {
  const [items, setItems] = React.useState(['Milk', 'Eggs', 'Bread']);

  const handleDelete = (index: number) => {
    setItems(items.filter((_, i) => i !== index));
  };

  return (
    <FlatList
      data={items}
      keyExtractor={(item, index) => index.toString()}
      renderItem={({ item, index }) => (
        <GroceryItem item={item} onDelete={() => handleDelete(index)} />
      )}
    />
  );
};

export default GroceryList;
Conclusion
With just a few steps, we’ve added swipe gestures to a React Native app using Swipeable, making our grocery list more interactive and user-friendly. This method can be extended to other actions like archiving emails, marking tasks as done, or revealing additional options.
Want to take it further? Try adding swipe-to-undo, haptic feedback, or even smooth animations using react-native-reanimated for a more polished feel. 🚀
