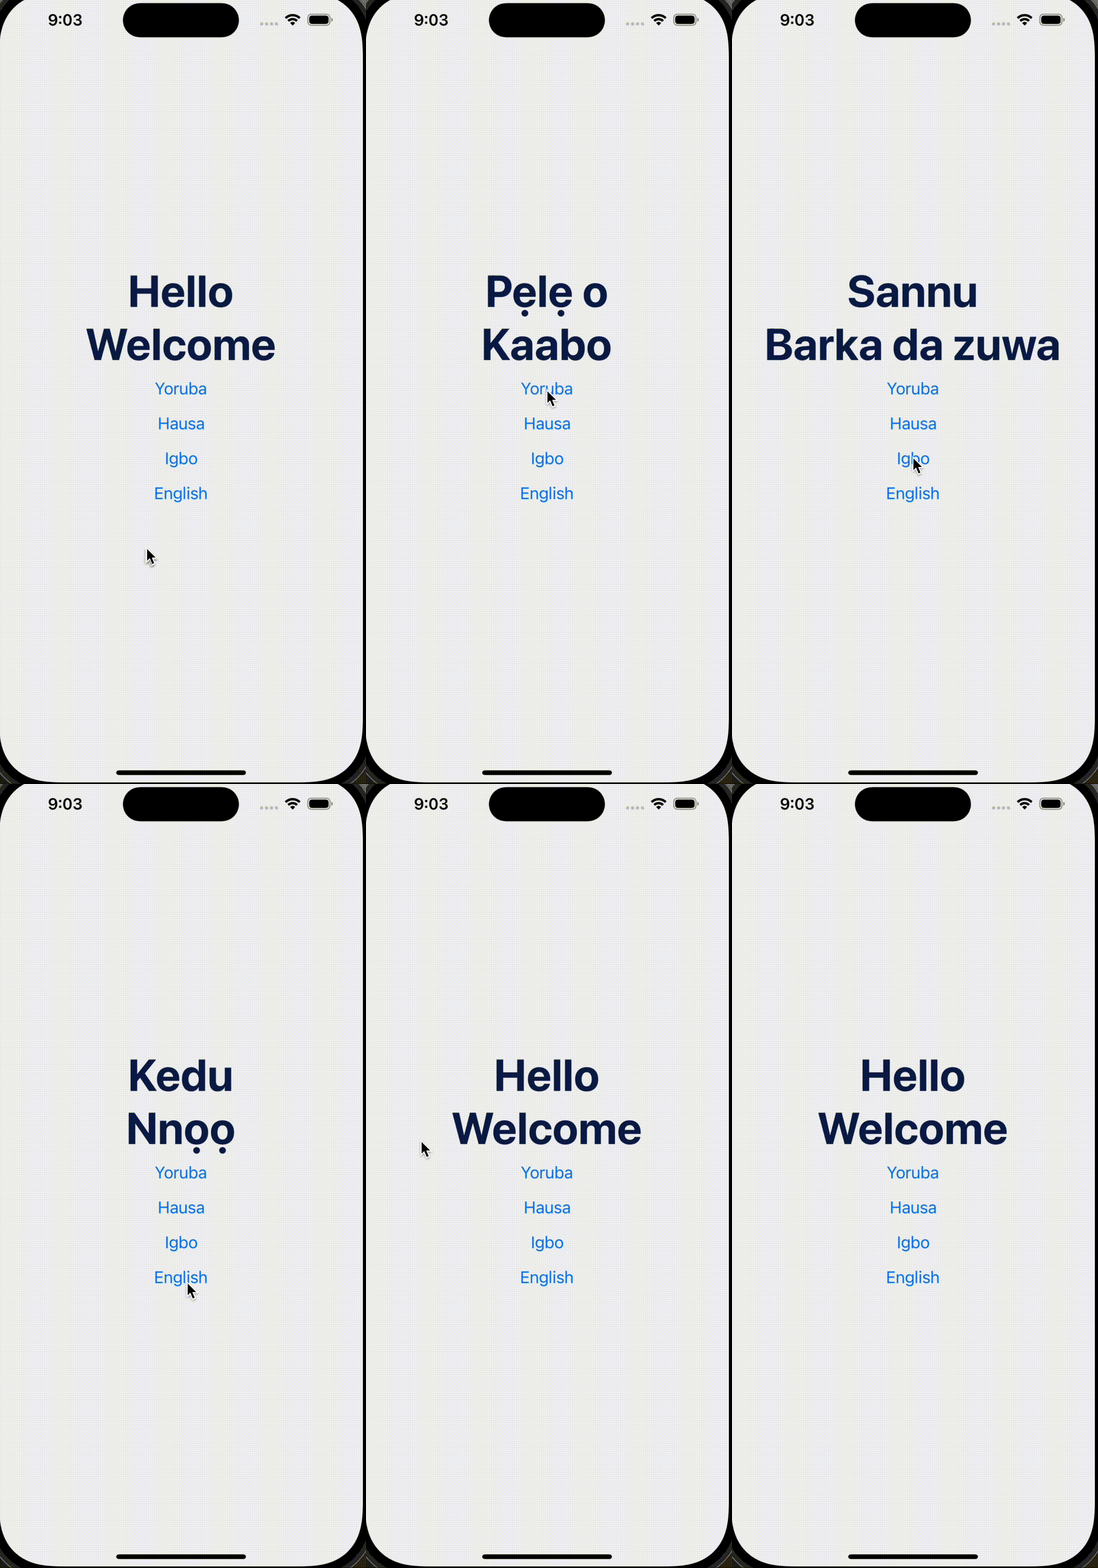
Building a React Native app that supports multiple languages is a great way to reach a wider audience. Whether you're expanding to different countries or creating a more inclusive experience for users worldwide, internationalisation (i18n) is key to growing your audience.
In this post, we'll walk through how to make your app multilingual, how to handle different formats (like dates, numbers, and currencies), and how to give your app a localised touch.
What is Internationalisation (i18n)?
Internationalisation (i18n) sets the foundation for your app to support multiple languages and region-specific settings. Once i18n is in place, you can easily translate content and customize features like date formats, currencies, and more to fit different locales.
Setting Up i18n in React Native
To make your app multilingual, you'll need a library that handles i18n. React-i18next is a popular choice that offers straightforward tools for managing translations and locales in React Native.
Install react-i18next i18next react-native-localize
First, we need to install the library and a language detector:
npm install react-i18next i18next react-native-localize
npm install -D @types/i18next
cd ios && pod install
Or, if you use yarn:
yarn add react-i18next i18next react-native-localize
yarn add -D @types/i18next
cd ios && pod install
Make sure your tsconfig.json allows JSON imports:
{
 "compilerOptions": {
  // other configs
  "resolveJsonModule": true,
  "esModuleInterop": true
 }
}
Set Up i18next Configuration
Let's create a folder structure to organise our localised text files and initialisation file like this:
src/
│   App.tsx
│
├── i18n/
│   ├── index.ts
│   └── locales/
│       ├── en.json
│       ├── yo.json
│       ├── ha.json
│       └── ig.json
│
└── screens/
    └── HomeScreen.tsx
Create an index.ts file in the src/i18n directory. This will handle the initialization of the i18n library and the language detection logic.
import i18n from 'i18next';
import {initReactI18next} from 'react-i18next';
import {getLocales} from 'react-native-localize';

// Add more languages as needed
import en from './locales/en.json';
import yo from './locales/yo.json';
import ha from './locales/ha.json';
import ig from './locales/ig.json';

// Custom language mapping for Nigerian languages
const LANG_MAP: Record<string, string> = {
  'en': 'en',
  'en-NG': 'en', // English (Nigeria)
  'yo': 'yo', // Yoruba
  'yo-NG': 'yo',
  'ha': 'ha', // Hausa
  'ha-NG': 'ha',
  'ig': 'ig', // Igbo
  'ig-NG': 'ig'
};

// Language detection
const languageDetector = {
  type: 'languageDetector' as const, // Explicitly set type
  async: true,
  detect: (callback: (lang: string) => void) => {
    const locales = getLocales();
    const firstLocale = locales[0]?.languageTag ?? 'en';
    callback(LANG_MAP[firstLocale] || 'en');
  },
  init: () => {},
  cacheUserLanguage: () => {}
};

// Initialize i18n
i18n
  .use(languageDetector)
  .use(initReactI18next)
  .init({
    resources: {
      en: {translation: en},
      yo: {translation: yo},
      ha: {translation: ha},
      ig: {translation: ig},
    },
    fallbackLng: 'en', // Default to English if the locale isn't available
    interpolation: {
      escapeValue: false
    },
   compatibilityJSON: 'v3'
 });

export default i18n;
Handling Multiple Languages (Including Nigerian Languages)
To make your React Native app accessible to a wider audience, it's essential to support multiple languages. In Nigeria, this means catering to Yoruba, Hausa, and Igbo speakers, alongside English.
Using a custom LANG_MAP, we can map device locale codes to our supported languages:
This ensures users see the right translations even if their devices use region-specific codes. If a device's language isn't supported, the app defaults to English.
This approach not only enhances the user experience but also makes your app more inclusive and culturally relevant.
JSON Files for Translations
Now, let's create our translation files. For this example, we'll support English (en.json), Yoruba (yo.json), Hausa (ha.json), and Igbo (ig.json).
locales/en.json (English as the default language)
{
  "welcome": "Welcome",
  "greeting": "Hello"
}
locales/ig.json (Igbo)
{
  "welcome": "Ndewo",
  "greeting": "Nnọọ"
}
locales/ha.json (Hausa)
{
  "welcome": "Barka da zuwa",
  "greeting": "Sannu"
}
locales/yo.json (Yoruba)
{
  "welcome": "Kaabo",
  "greeting": "Bawo ni"
}
Use Translations in Your App
Now that we've set up i18n and created translation files, let's use them in our components.
First, import the useTranslation hook from react-i18next to access the translations.
import React from 'react';
import { Text, View, Button, StyleSheet } from 'react-native';
import {useTranslation} from 'react-i18next';

const HomeScreen = () => {
  const {t, i18n} = useTranslation();

  const changeLanguage = (lang) => {
    18n.changeLanguage(lang);
  };

 return (
   <View style={styles.container}>
     <Text style={styles.text}>{t('greeting')}</Text>
     <Text style={styles.text}>{t('welcome')}</Text>

     // Optional: Buttons for manual language change
     <Button title="Yoruba" onPress={() => changeLanguage('yo')} />
     <Button title="Hausa" onPress={() => changeLanguage('ha')} />
     <Button title="Igbo" onPress={() => changeLanguage('ig')} />
     <Button title="English" onPress={() => changeLanguage('en')} />
   </View>
 );
};

const styles = StyleSheet.create({
 container: {
   flex: 1,
   justifyContent: 'center',
   alignItems: 'center',
 },
 text: {
   fontSize: 48,
 },
});

export default HomeScreen;
After setting up internalization, make sure to check your app on both iOS and Android to confirm that the text is displayed correctly in all languages.

